Automating with the Amazon Web Services API: Keys
 I got my first real exposure to cloud architecture a couple years ago. I was a contractor and the client wanted to track usage of Amazon Web Services(AWS) across different internal teams for financial reasons. They also realized the potential for automating infrastructure using the AWS API and wanted us to explore the numerous options while working with system administrators to define behavior. It was here that I got first-hand experience on how the cloud computing model enabled building and scaling systems where capacity is largely unknown. I was able to experiment with the ephemeral nature of the cloud and the many benefits it can bring to an organization. It’s been awhile since that job, but it sparked a passion for cloud computing that I still carry. Like playing an old video game again, I want to re-explore some of the things I had done then and maybe pick up a few new tricks along the way. I’m also going to try to minimize my usage of the word “cloud” to avoid looking foolish with the numerous “cloud to X” plugins out there (or not, because it’s hilarious every time).
Overview
In order to interact with the AWS API, you need a set of credentials to authenticate with. While you can create a root key with unlimited access to all account resources, it’s generally recommended that you filter access with policies. In this article, I’ll go through creating a user, placing that user in a group, and restricting AWS resource access by applying a policy to the group.
AWS Account and Free Tier
Amazon offers a small taste of many of their services for free to whet your appetite. You can check out which services and the limitations at https://aws.amazon.com/free/. Sign up if you haven’t yet.
Create an IAM User and API Keys
Now that you’ve got an account, we’ll need to create a set of credentials to send along with each request to the AWS API before we can begin using it. When communicating with the AWS API, you need at a bare minimum the following pieces of data:
- Access Key ID
- Secret Access Key
- Region
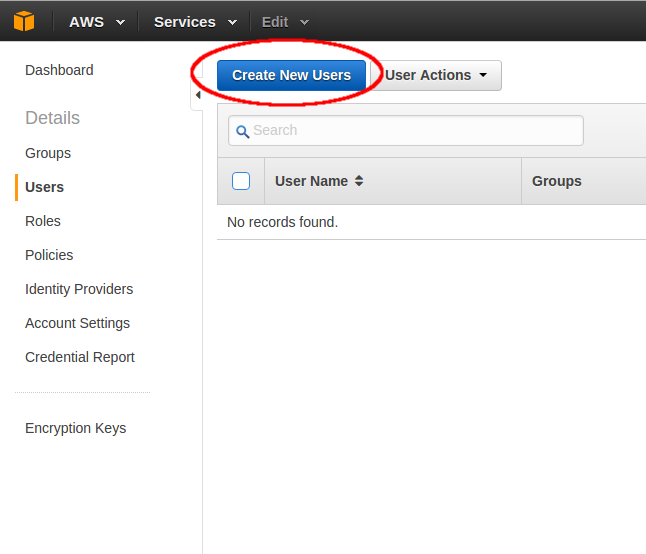
If you’re signed in to the Amazon Console, click IAM, then “Create New Users”.
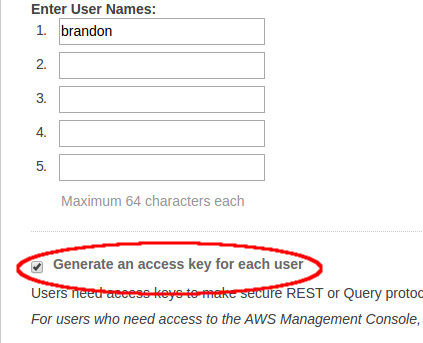
Make sure “Generate an access key for each user” is checked when creating users.
After creating the user(s), you will be shown an "Access Key ID" and a "Secret Access Key".
Is It Secret? Is It Safe?
Treat these two strings as if they were passwords. With them, anyone can create, view, and modify anything within the applied policy. Don’t check them into version control, don’t email them to teammates or colleagues, don’t post them to any “Enter your AWS API key and we’ll tell you how secure it is” web forms. You only get this one chance to copy or download the secret key and please be careful with it.
Policing with Policies
An IAM policy is a JSON representation of what a user can and can not do within AWS. We can create a mix of whitelists and blacklists and also be very specific or very broad with resource permissions. Amazon recommends a practice called “least privilege", which means to only give permissions where needed. There are many example policies available in the AWS console, but we may as well make our own. Go to Policies in IAM and click Get Started, then Create Policy, then Create Your Own Policy.
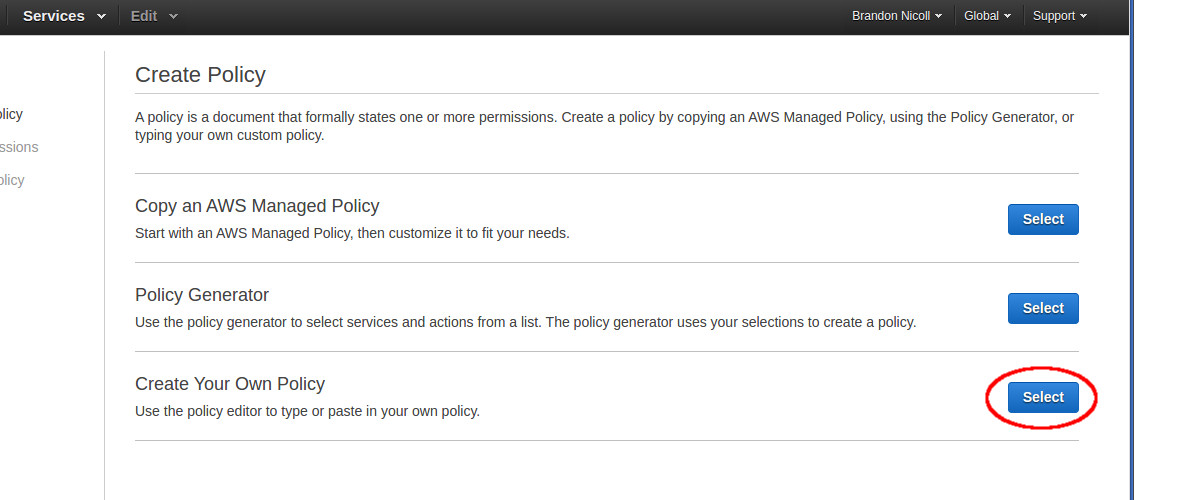 Here we can write a JSON block explicitly calling out what this policy will allow/disallow. An in-depth explanation of the syntax can be found at the Policy Grammar page of the IAM user guide. Something else of note is the way in which we reference AWS resources when granting permissions, Amazon Resource Names(ARNs) and AWS Service Namespaces. We can specify entire AWS products to grant/deny the permission to all the way down to individual resources. To keep this simple, I’m going to create a policy that allows access to all EC2 resources.
{
    "Version": "2012-10-17",
    "Statement": [
        {
            "Action": "ec2:*",
            "Effect": "Allow",
            "Resource": "arn:aws:ec2"
        }
    ]
}
Looking for Group
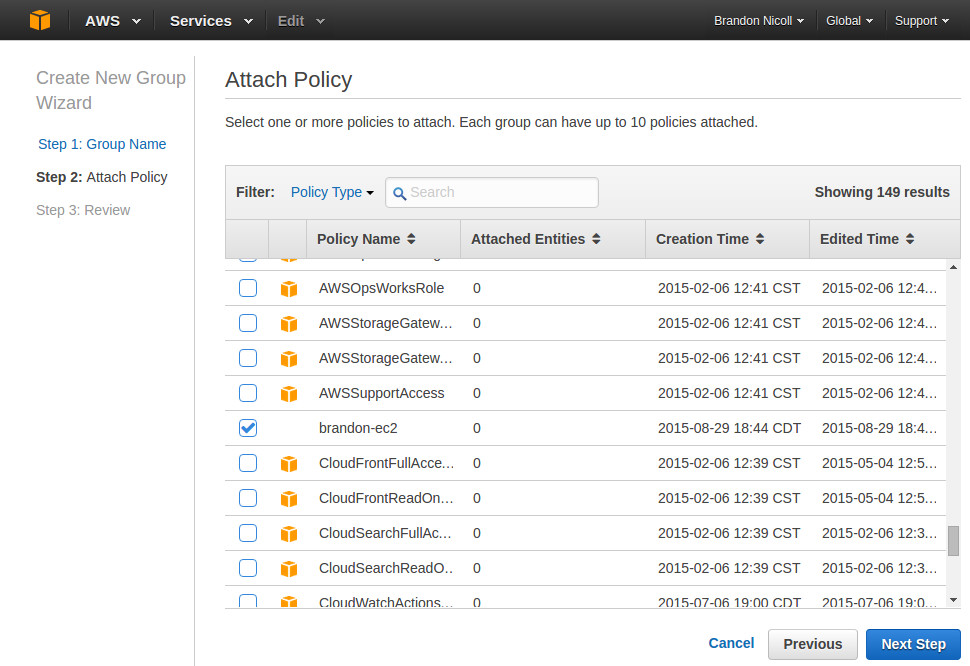
Next we’re going to create a group that we can apply a policy to. To avoid duplication of work later, it is considered good practice to add users to groups and apply policies to the groups instead of individual users. Go to the Groups page under IAM and click “Create New Group”. Give the group a name, click “Next Step” and here we can find the policy we just created, along with many pre-baked policies provided by Amazon. Click “Next Step” and create the group.
Add User
Click the group name, then “Add Users to Group”, add the user(s) you created earlier. Now we can test the whole thing.
Policy Simulator
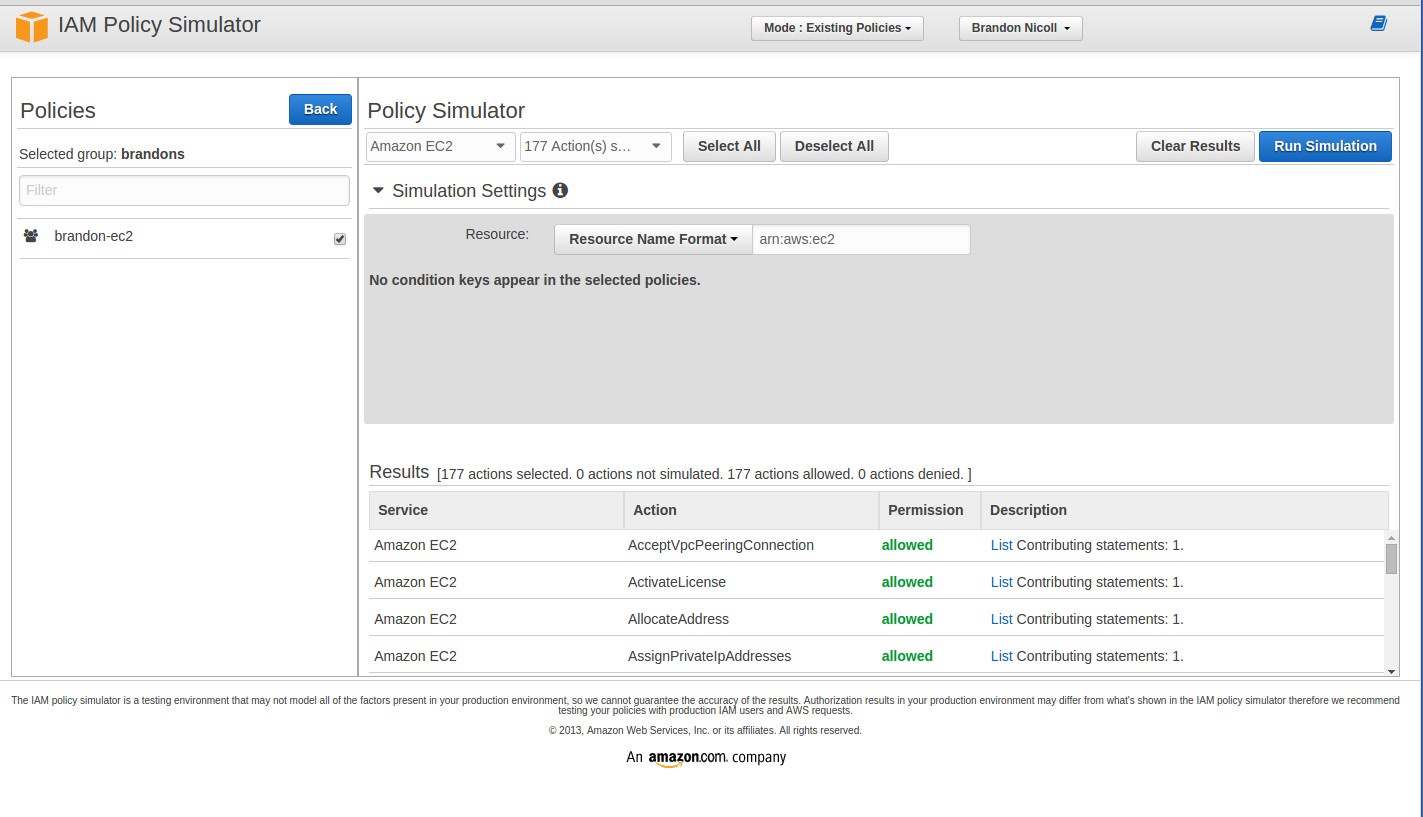
Amazon provides an IAM Policy Simulator to test actions against the API by certain users and groups. Select either the user or the group, select “Amazon EC2” and a few (or all) actions. Set Simulation Settings to which resources we want to test against and click “Run Simulation”. You should see all “allowed” under the “Permission” column. The simulator is a powerful tool where you can experiment with policies and actions against AWS resources without actually performing them.
Conclusions
You can now use the access key ID and the secret access key in combination to start making AWS API EC2 calls. You’ll need to make new policies to apply to groups or extend existing ones depending on your policy strategy as you automate AWS product usage.